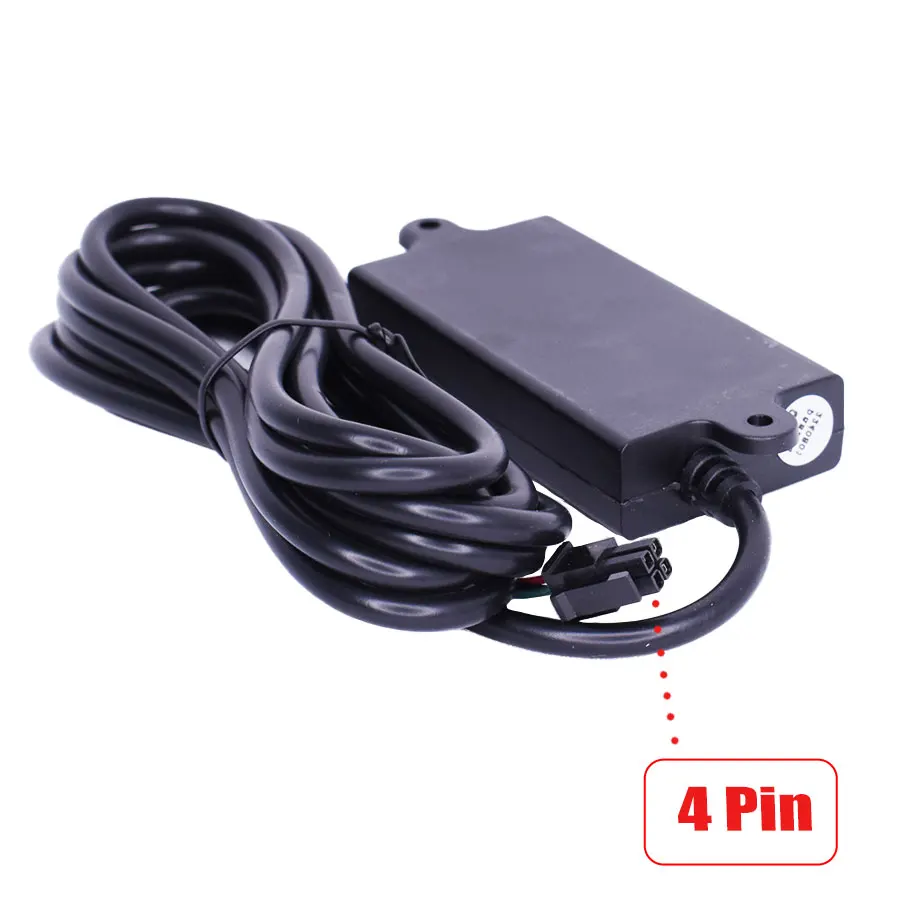
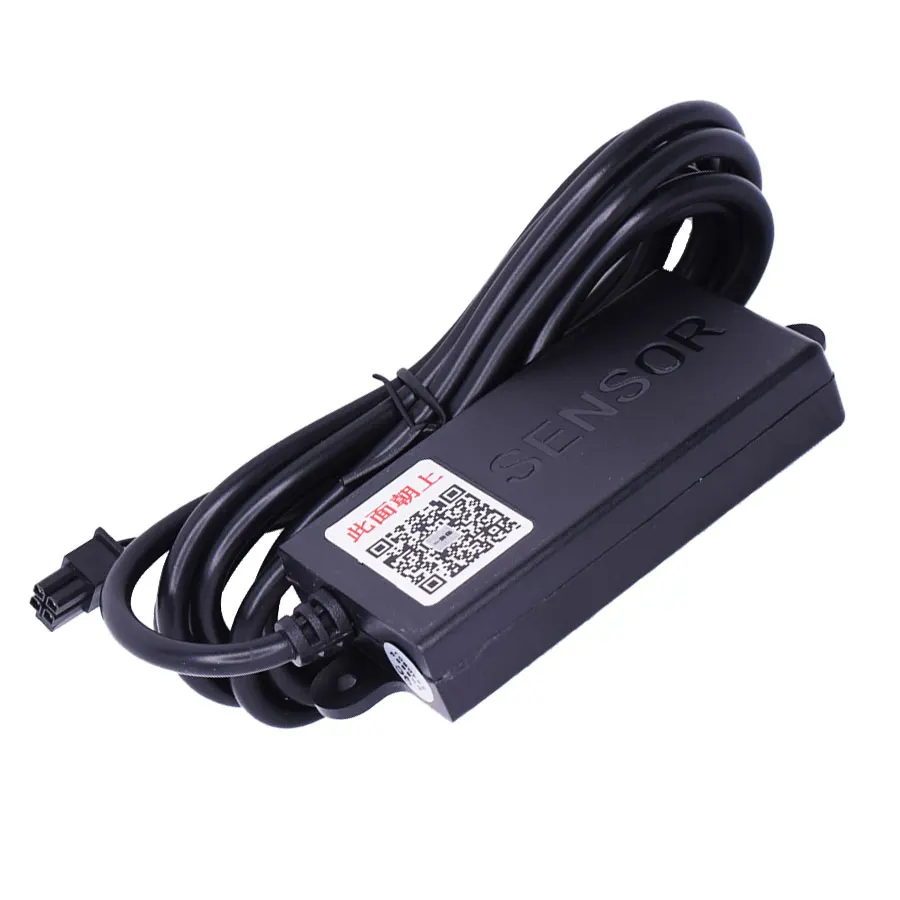
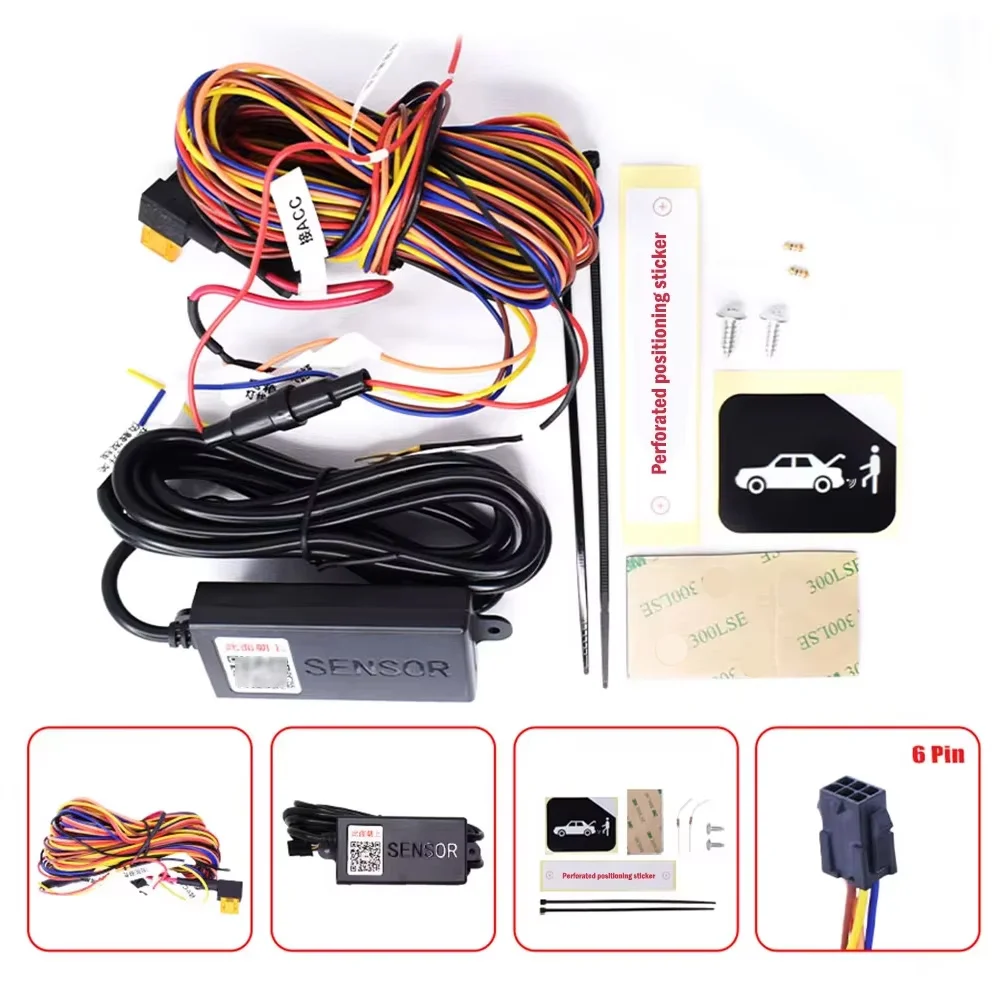
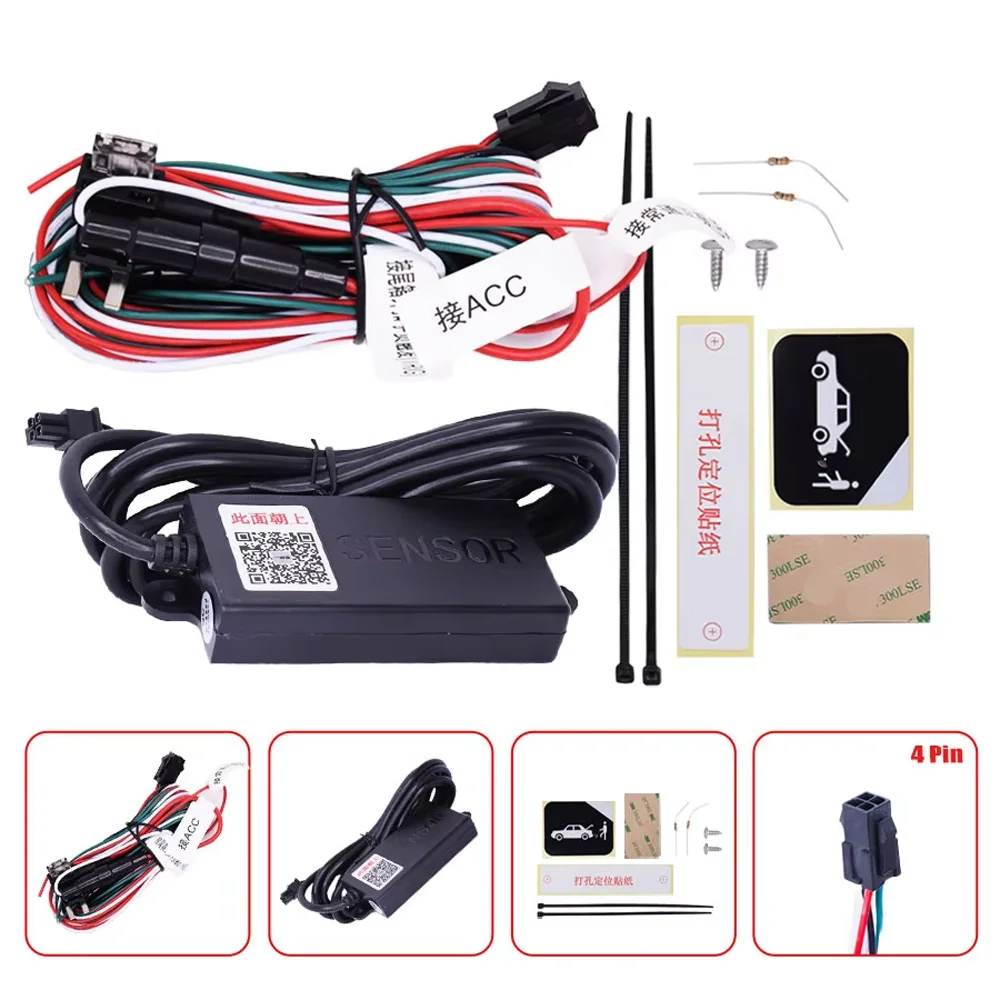
SPECIFICATIONS
Brand Name: NONE
High-concerned chemical: none
Origin: Mainland China
4/6 Pin Tailgate Modified Part Auto Kick Sensor Car Power Rear Door with Kick Sensor Upgrade Kit Car Accessories For Universal
Description:
The kick sensor sets new standards for opening rear hoods. Thanks to its very small installation space and flexible sensor wires.
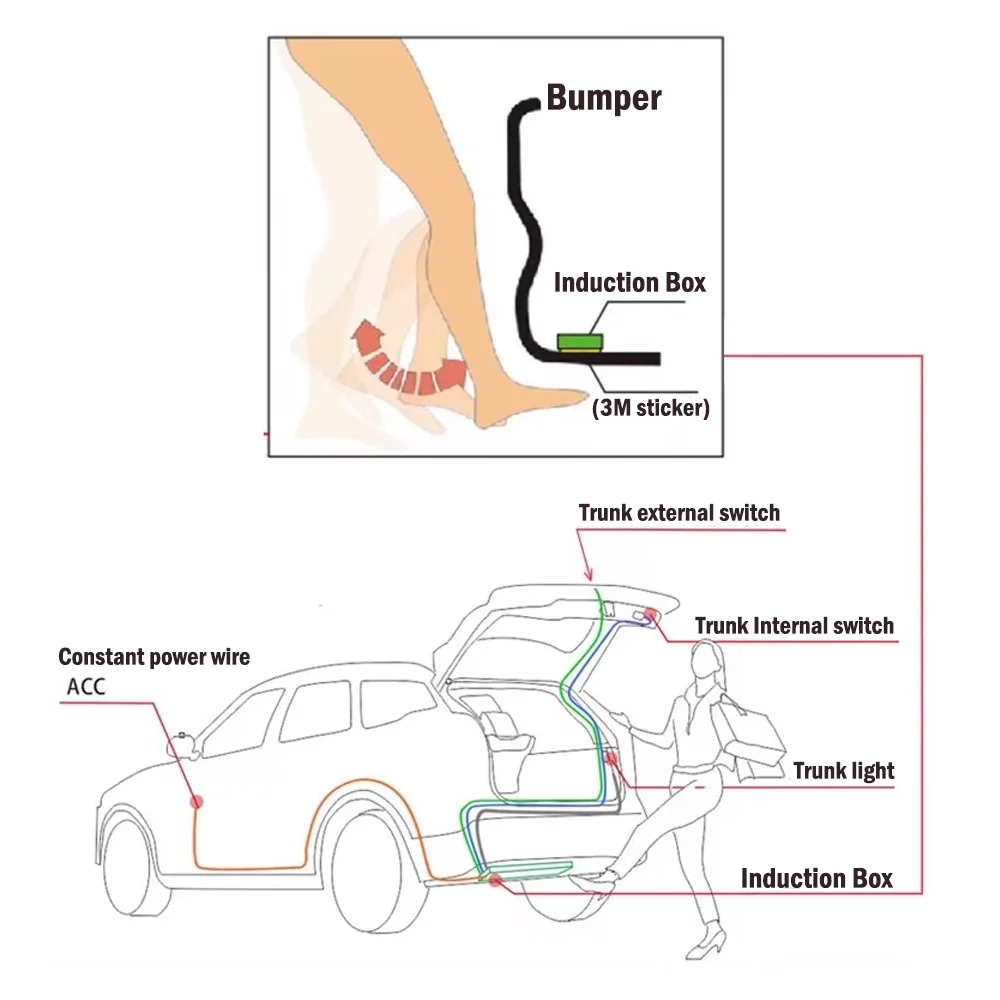
A simple kicking movement under the rear bumper and the trunk opens or closes automatically.
Specification:
Voltage:DC5~18V
Working Current:5mA
Starting Time:2S
Microwave mode of operation:intermittent type
Emission Frequency:24.125±0.125GHz
Working Temperature:-40~85 °C
Waterproof Rate:IP68
Features:
1. The third generation of products USES microwave induction, which is more convenient than the traditional induction system installation, and more effective to prevent the wrong trigger. If something else goes under the car, the door won't open.
2. Keep your keys close to the car and kick out the trunk. You have to unlock it, Otherwise it won't work.
3. The signal is shielded during driving to prevent the tail door from triggering during driving.
4. It is very intelligently can push the door to the semi-lock position and the system will complete the rest of the closing.
5. The door closing process is very comfortable and noiseless.
6. Gently close the door to make the closing more graceful.
Installation steps and precautions:
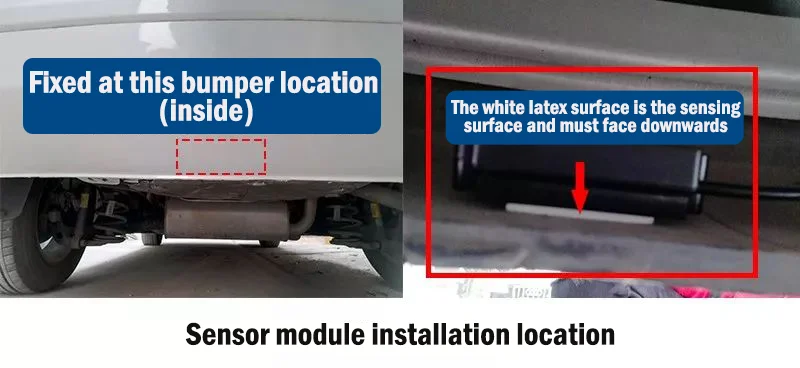
1. First, clean the inside of the rear fender where the sensor is to be installed. Do not leave any foreign matter such as dirt, dust, and water. The best location for installing the sensor is in the middle of the rear of the vehicle.
2. Align the hole marks on the sticker and use the provided screws to drill holes, making sure the screw caps are on the outside.
3. When the screw is drilled into the fender about 1 cm, stop drilling. Place the holes on the left and right sides of the sensor on the inside of the fender on the screws drilled into the fender. The side with white glue is the sensing side, and the sensing side must face down to the ground. Be careful to feel the screw position slowly to prevent the screw from scratching your hand.
4. Continue to tighten the screws to fix the sensor. Note that after tightening the screws, the white glue and the inside of the fender should fit completely together, and no gap should be left in the middle to prevent mud and sand from entering and affecting the use effect.
5. If there are grids, protrusions or other structures on the inside of the fender, which causes the white glue on the module to not fit completely with the inside of the fender. Be sure to polish the grids, protrusions or other structures. Or fill them with glass glue. Otherwise, water and sand will mix into the gaps in the middle, which will have impact on the performance of the
sensor.
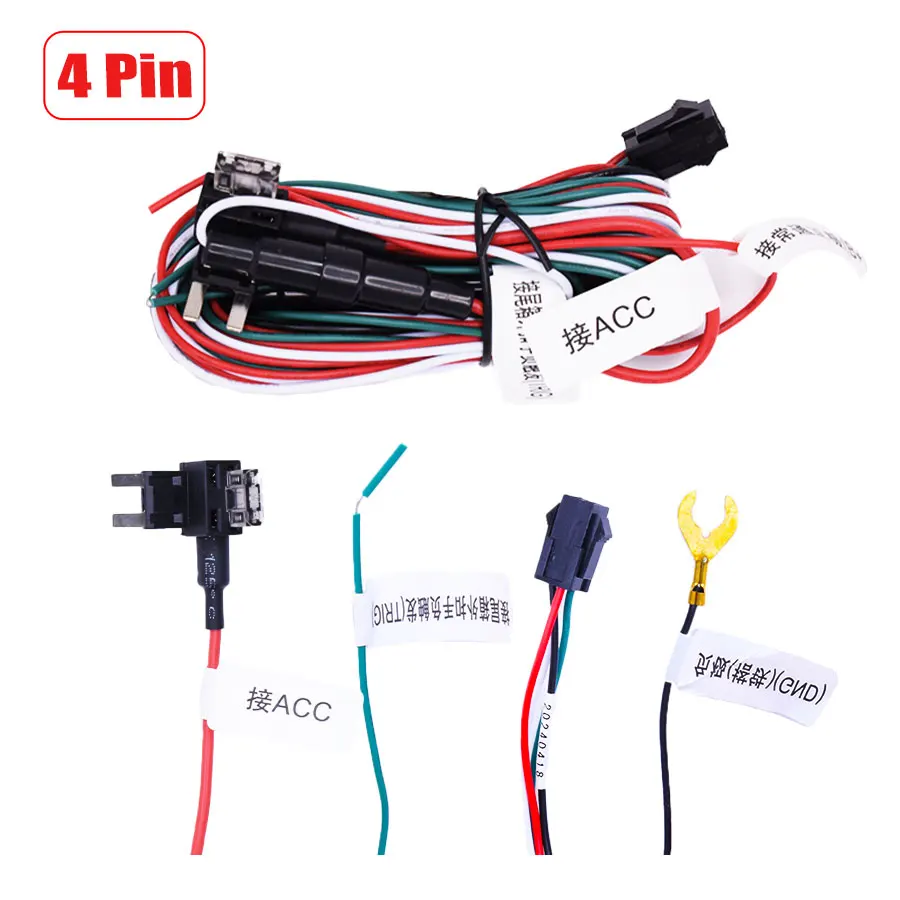
Extension cord connection method:
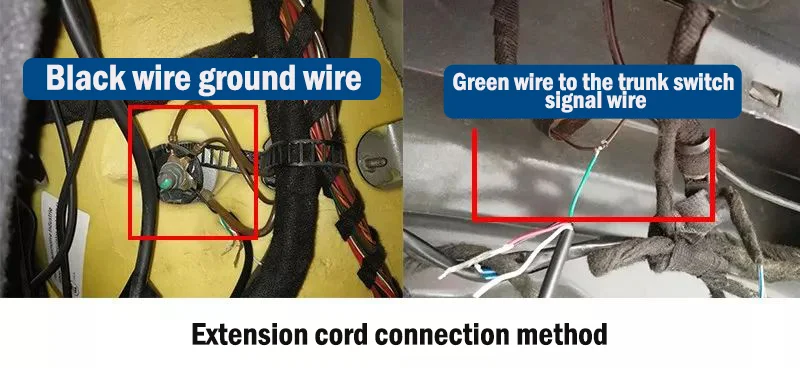
1. Black wire (negative power supply): ground wire;
2. Green wire (tailgate button wire): use a capacitor test pencil to connect one end of the ground wire and the other end of the original car tailgate button wire to keep good contact. At this time, press the original car tailgate button, the light of the capacitor test pencil goes out, and it is still on when not operated. It is the tailgate button wire. (Diode test pencil )
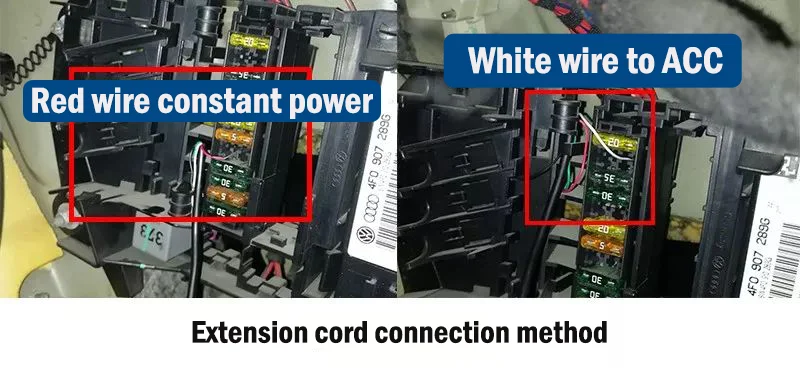
3. Red wire (positive power supply): connect to the original car 12 volt normal power;
4. White wire (ACC): use a capacitor test pencil to connect one end of the ground wire, and keep one end in good contact with the measured wire. At this time, when the original car key hits ACC, the test pencil light will light up. When ACC is turned off, the test pencil light will go out, then this line is ACC.
Note: After connecting all the wires, wait for 20 seconds for self-test and then test again
Note:
1. The trunk shall need a hand button. This product just fit the car with electric tail gate lift. If your sedan doesn't have an electric tailgate, you can only open it with one foot and not close it.
2. If you are not sure if it can be installed, you can contact us.
3. Be sure there is enough space in the rear bumper for installing the sensor.